Hi, my lovelies! I hope that you all are having a great day, how’s the weather in your country? It’s really cold and it rains almost every day in my country these days.
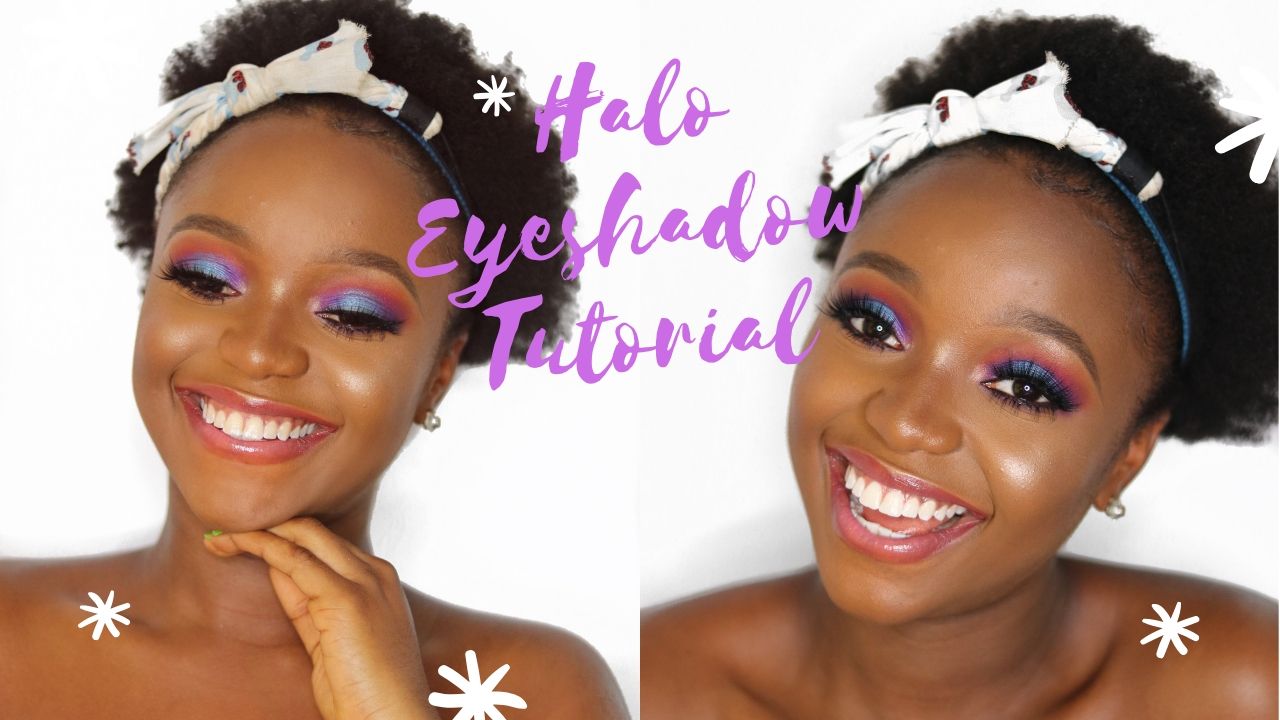
This article is a little different from what I have talked to you guys before. Today, we will be talking about how to create a Halo eye-makeup look. I will take you through the instructions, step-by-step. You can try creating this look while going out for a summer party. Don’t think that its name is confusing so it will be a difficult one. I have explained the easy steps down below. This look will help to make your eyes appear bigger as well.
Let’s move on and create an amazing Halo Eye makeup look!
1. Always start off with a primer
A primer is a basic necessity before starting off with eye-makeup. A primer also helps to make eyeshades pop and last a very long time. Apply your primer as the first step before we move on to the second step. One of the cult classic is the MAC eye shadow primer which comes in a little pot, other less expensive and equally good eyeshadow primers are Ben Nye clown white and LA Girl eyeshadow primer.
2. Take a transition shade and put it in the crease
A transition shade is great to add more depth in your eye look. It is usually a light colour that will help all the next eyeshades blend better. This is also very important while working on a Halo eye.
3. Apply a medium-toned eyeshadow to the inner and outer corners
First off, you need to know the basics of how to apply eyeshadow properly. In this next step, let’s assume that we are going for a purple and blue eye (video below). For that, you need to put the purple shadow in the inner and outer corners of the eye. You can make it darker to add more depth to the eye look. Make sure you’re using the appropriate brush for this. To know what brushes to use for what, check out this post different makeup brushes and how to use them. What you need to keep in mind is that your *corners* are the only areas with product until now. The eye-lid needs to be bare.
4. Proceed to darken your inner and outer corners
Using a smaller blending brush, use a little darker eye-shadow to make both the corners darker. Again, be careful with keeping the centre of the eye-lid free of the purple shade.
5. Create the Halo with the Light Shade on the Eye-lid
This is the step that we all have been waiting for. You can use a concealer to do a cut crease and create a clean base for the halo colour. Now pick up the lighter shade, in this case, and apply it to the centre of the eye-lid. This is “Halo” effect that means lighter shades in the centre while darker shades on the sides.
6. Brighten the inner corners
The inner corner now needs to be highlighted – for this step I use my Becca Champagne Pop Highlighter.
7. Darken the lower lash line
I personally would apply the dark brown eyeshade on the lower lash line of mine to add more depth to my eye look.
8. Finish off with eye-liner and mascara
For the last and the final step, apply your eyeliner (having issues with this, check this post, how to apply eyeliner perfectly) for a more defined eye-look. Top your lashes off with mascara!
Voila! Your Halo eye is ready!
Here’s a video tutorial of the steps explained in this post:
Let me know in the comments down below if you try out this easy method for this eye-look.
You can subscribe to my YouTube Channel for makeup videos and demonstrations of how I achieve a flawless makeup
I have a free gift for you as well, download my makeup tutorial booklet + videos FOR FREE.
Xoxo,
 💜
💜